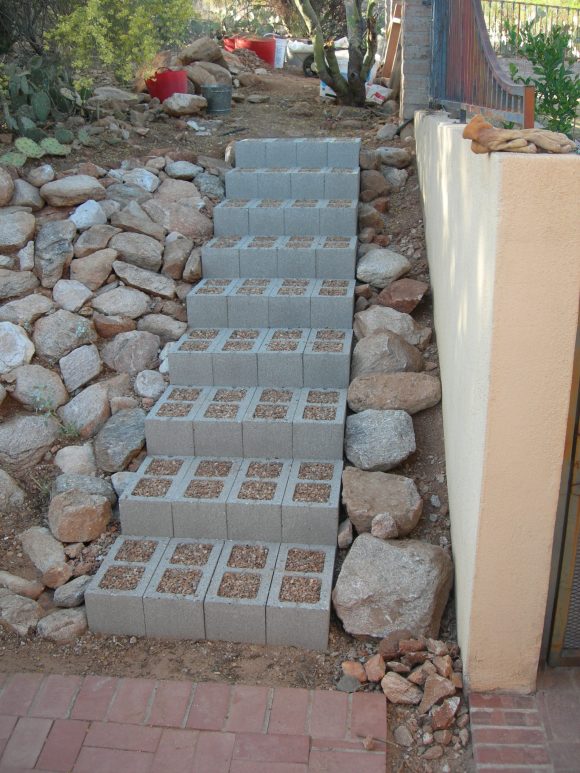
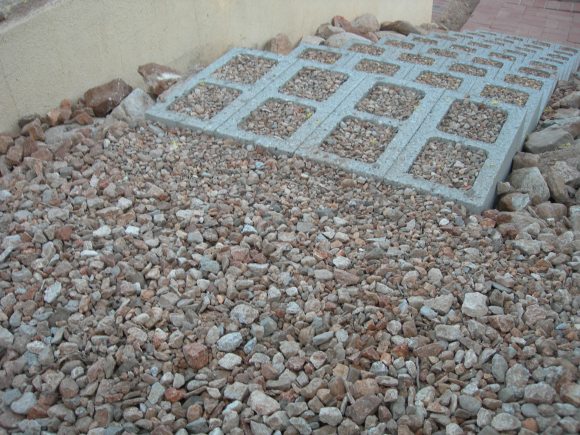
Here is the rip wrap from before with eight steps.
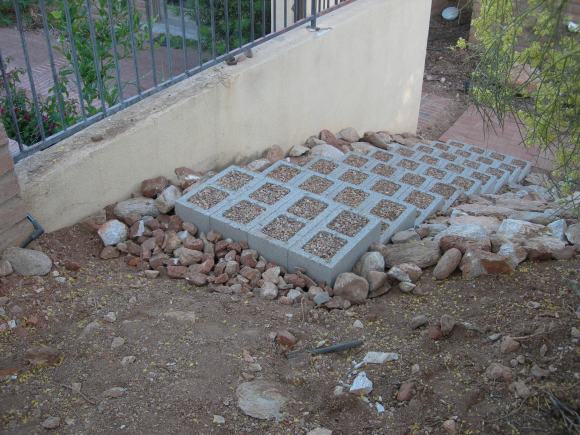
During the week I added a ninth step, and this weekend started on the rip wrap between the steps and the wall.
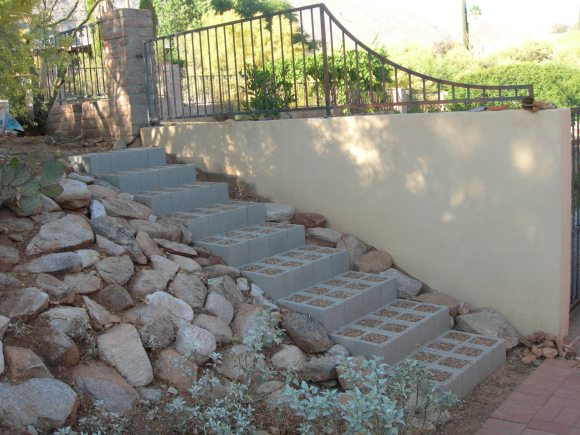
This view shows how the ninth step really helped bring the level of the top of the stairs up to the level of the ground at the top, four and a half feet above the brick walkway.
There was a gap at the top of the steps, between the steps and the ground, that I built up with varying sizes of rocks sorted out from all the dirt generated by this project.
Here’s another view.
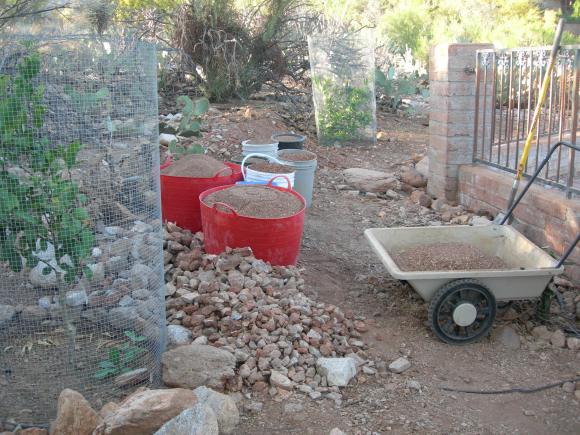
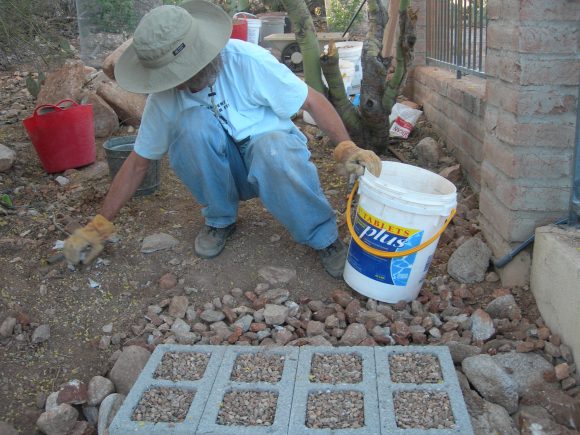
More rocks going in:
And more rocks:
The rock pile:
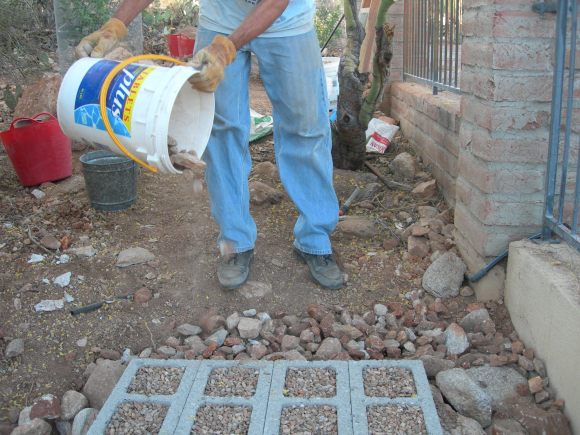
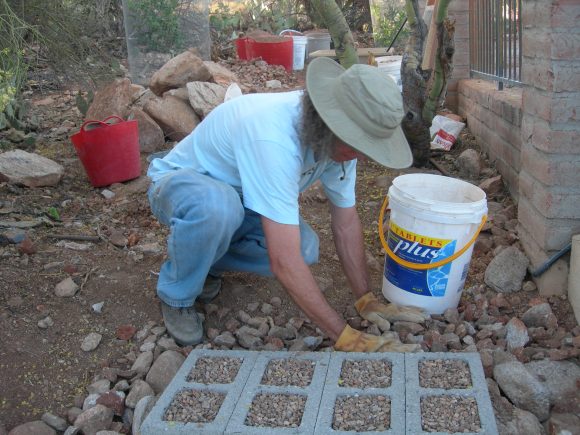
Fussing with rocks:
More fussing:
And more fussing:
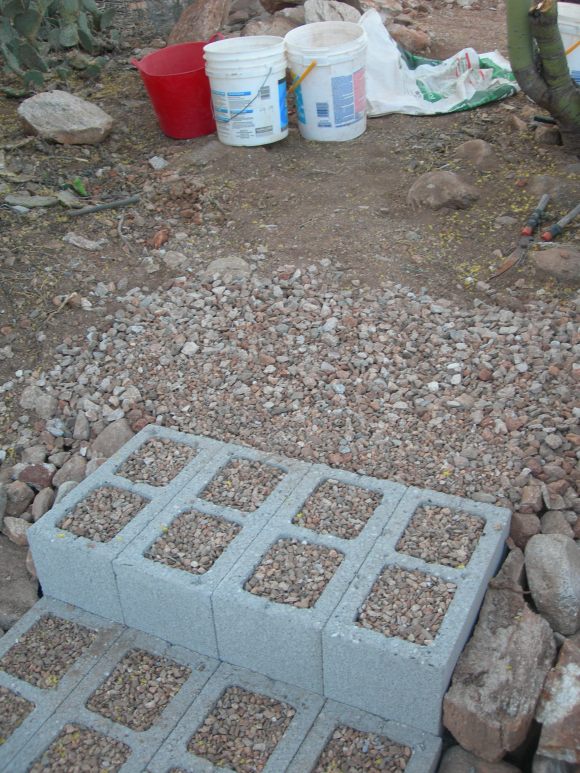
I covered the larger rocks with 1″ rocks and a few of the 1/4″ – 1/2″ rocks.
A Roadrunner came by to inspect my work.
The finished product.






Cool roadrunner! Cool steps!
Smashing!
[…] the design possibilities are endless. How amazing are these gravel-filled stairs from from Step by Step?!!! Best of luck on your cinder block endeavors… [via A Minneapolis […]
Hello. I just started a new project with cinder blocks. I’m attempting to make steps on a incline hill in my yard. How do you get the steps even as you go up? As I can see from your pictures, you use rocks to level the cinder blocks (am I right or am I just guessing?). Any advice will be greatly appreciated.
Hi. Yes, I used a 2″ base of pea gravel under each step. Starting from the first step, I believe I leveled off a spot and figured out the height of the first step. Then I dug down at least two inches in the area where the first step would go. Tamp down the earth after digging out the area. This will minimize settling. Then I filled that area up with pea gravel leveling it the best I could. I set the blocks one at a time. It turned out, at least for my project, setting the first block was the most important. It defines the direction of all the steps. Since my steps all butt up against each other, if the first step was not pointing exactly where I wanted the steps to go, the whole set of steps could veer off course. I was off a little bit, but was able to adjust by jogging each step over just a bit to correct for the error in direction. It was minor, so hardly noticeable.
Back to leveling. I would check the level of the pea gravel with a board the width of the step with a level on the board. Using this as a tool, I could push the gravel around with the board and get it mostly level and even. Pea gravel stays fairly compressed, but it wouldn’t hurt to tamp it down a little to settle it in. Then I would set one block. If it was two high, I would work it down into the gravel. If it was too low, I would raise it by pushing some more gravel under it. For the first block spend extra time getting the direction just right.
To level the block after the height is right, a small level, like the torpedo level shown in the pictures, works well. Blocks themselves are rough and can have raised edges, so it took some care to find good places to set the level that were without bumps that could throw off the level. I would adjust the level and height at the same time as I recall, because adjusting the level can affect the height. Once the first step was set, the next step was easier, because butting a block up against a block that is level makes the second block more or less level, at least in one direction. Of course check the level of each block in both directions before moving on to the next block.
It was a bit tedious, but rewarding. Several years later now, the steps still function. There has been a little settling and widening of the gaps between block, but it has held together quite well. Have fun with your steps!
[…] These steps make it easy to move to and from your house without breaking the bank. Tutorial at Thefigure5 […]
It has been over three years, and the steps are still in place. Look in the archives for descriptions from the beginning of the project. There are several posts in April 2012’s archive and at least one in the May 2012 archive.
Sorry, I meant to say March 2012. That is the first posting. The postings are in reverse. Following the sequence is a little cumbersome, but can be done.
What a super description of building your stairs, thanks so much. Judging by your surroundings, you live in an area very similar to mine (south NM). I wonder if you have the small rocks sprinkle out of the steps as you walk over them or do they stay in fairly well? I have flagstone here from previous owners with gravel in between and it is driving me insane cause it doesn’t stay in…
Yes, the small rock tends to move around. It doesn’t help that pack rats or other rodents like to dig in them. I have thought about removing the top inch or so and replacing with 1-inch rock.
Tuson is a similar area to southern NM, but Sonoran Desert. Maybe southern New Mexico is in the Chihuahuan Desert? Somewhere in Southeastern Arizona three deserts come together.
[…] thefigure5.wordpress.com […]
[…] thefigure5.wordpress.com […]
you could see if two pavers (or other) would fit on the top of the small rock and level to the top of the brick?
Yes, that might work, but also might be tricky to find just the right size pavers, and leveling. I like the idea of the natural materials from the area. I just need to get motivated to work on sifting and sorting again.
Richard, I just came across your build, very interesting and is just what I have been looking for to accomplish on a steep slope here, the only problem I have is the blocks in my area are not that solid and crumble easy, so I might have to fill with a cement slurry. thanks for the idea.
Hi Michael, sounds good.
Hi, thankyou for your tutorial, we live in Australia, the area where we would like to copy your project is subject to heavy rain at times, have you experienced any erosion and movement due to rain?
Thankyou!
Hi Julia, I think as long as the water doesn’t undercut block and wash away the gravel underneath, you should be okay. It’d be good to support sides of the steps to keep them from moving apart. I have the rocks on either side which works well. You could also pin them in place as needed with lengths of rebar driven into the ground.
I put individual steps like these, four blocks wide, on a steep trail near a cabin in the mountains outside of town, just imbedded in the ground, to make it easier to walk down to the outhouse. It was years ago, almost 10 years. I was there this past weekend, and they were still there. I half expected they would have washed out because it’s steep ground, and it rains a lot more there. That location is really rocky, mostly granite, and I hammered in rebar in places thinking it would keep the steps from sliding down the hill. I made some of the fill for the blocks by breaking up the native rock with a two pound hammer.
Thank you for the tutorial, however it begins with the steps already in place. Do you have step-by-step instructions (and pics) that show the project prior to you laying the cinder block steps? How did you carve out the steps? Are the cinder blocks interlocking? Any additional information would be great!
In the April 2012 archive, there are several entries, the first being April 2, 2012. It’s a little confusing because the most recent post appears at the beginning. By scrolling down you can see earlier posts. If you read each one in order, I think you will get the gist of how to proceed. (The March 2012 entry shows prior to starting the steps, but is related to plumbing repairs rather than the steps.) The cross section drawing at the beginning of the April 2, 2012 entry shows the plan and how the site was prepared for the first step. Later April 2012 entries show how the hillside was carved out for the n+1 step after the nth step was in place. The blocks don’t interlock.
When I came across this post I was like, “Thank you GOD!!! There is actually a way to help handle my slope and erosion problem!” I live in Atlanta, Georgia so my issue is red dirt that gets everywhere when we get heavy rain. I appreciate you sharing this great and inexpensive idea, kudos!!!!
Thank you Eva. I tried replying, but it seemed to get lost when yours was approved.
It’s been five years, and I can report that the steps are holding up. There has been no problem with the steps trying to slide down the slope, but the ground here in Tucson is hard and rocky. The blocks are separating a little, despite having rocks on either side of the steps.
In Atlanta, you might want to pin the blocks in place with pieces of rebar, maybe 24″ pieces. One could be added for some or each block, driven into the ground inside one of the two voids in a way to hold the blocks together and keep them from sliding downhill or moving side to side. Because you mention erosion, rebar stakes might be a good precaution to hold the steps in place.
I have used rebar on a few steps at a cabin in the Catalina mountains on steep terrain, heading down to one of the outhouses. Despite them being partially undercut because of the loose soil and steep terrain, last I looked at them they were staying put. Sorry I don’t have pictures of what I mean. I could go up and take pictures, but the whole district of national forest is off limits because of dangerous conditions in the Bighorn Fire scar area.